Smart Home in a Flat: Where to Start in 2026
Build a smart home on Zigbee and Home Assistant for £300-500. Real UK kit, prices, automation scenarios, and how it ties into your consumer unit.
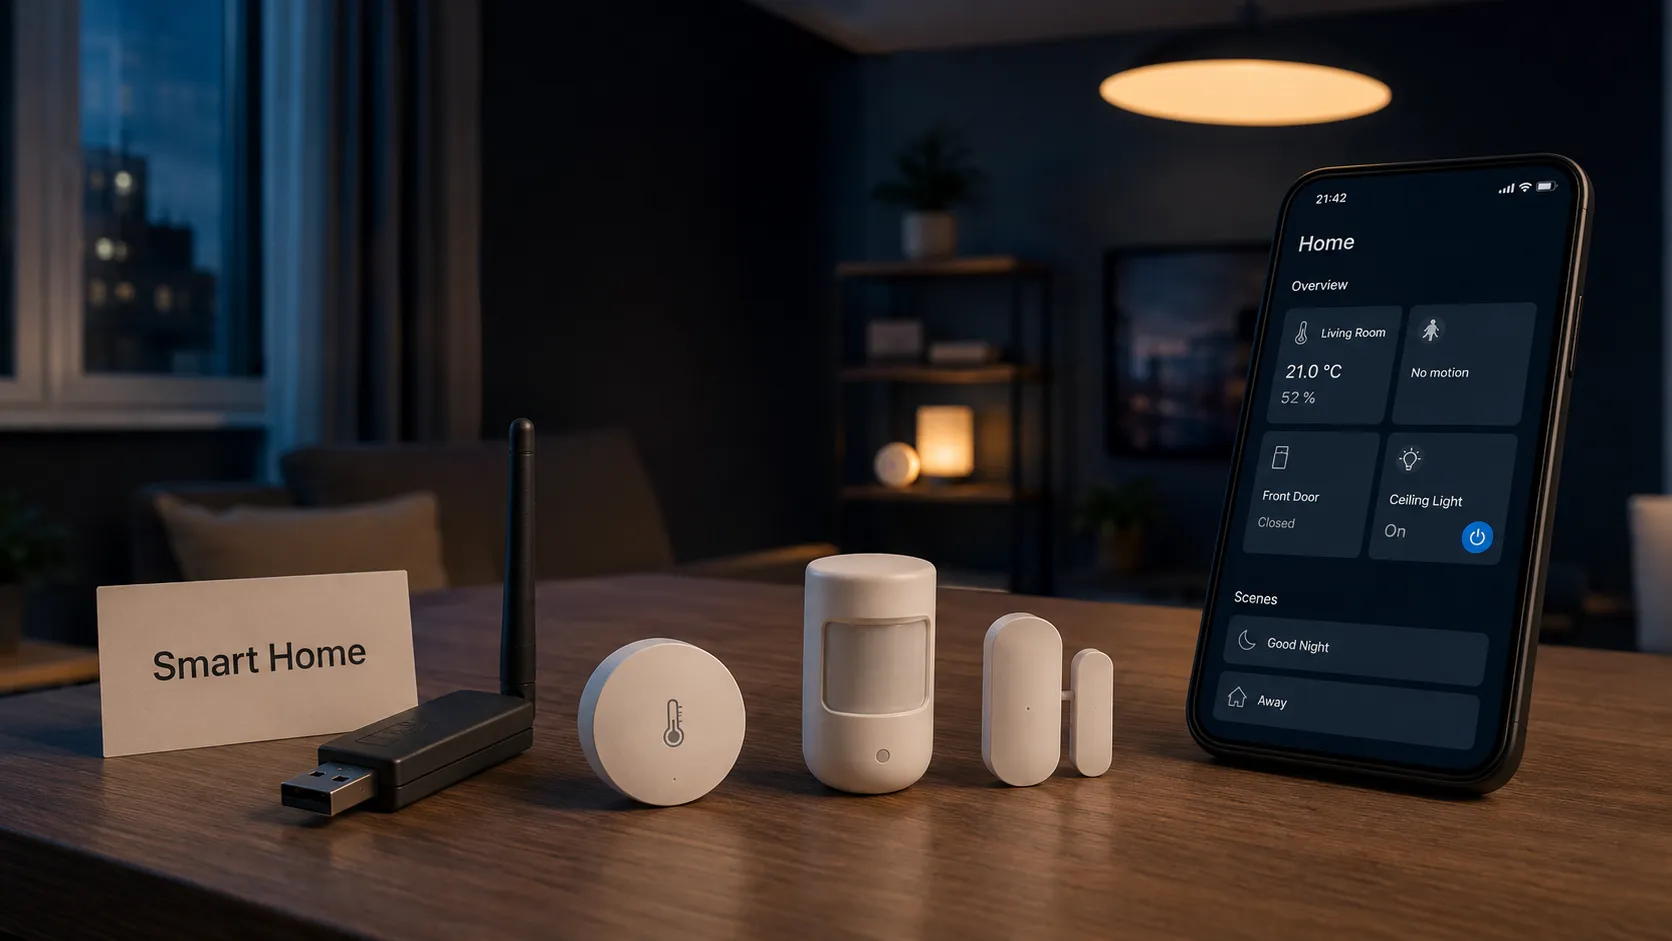
After I'd finished wiring my consumer unit, it dawned on me that all those breakers and circuits were sitting on a far bigger opportunity than just splitting up the load. Not sci-fi. Proper, useful automation — the immersion that switches itself off overnight, the hallway light that comes on the second you open the front door, a ping on your phone if a window opens while you're at work.
I got fed up of trekking round the flat turning lights off, forgetting the heater was on, and fretting about the place while away for a week. So I set myself a budget — a few hundred quid, no more — and built one anyway. Mates told me I was wasting my time. "Smart home starts at a grand, mate, anything less is a toy." Turned out to be nonsense: a Zigbee coordinator, a handful of sensors, a couple of behind-switch modules, and free Home Assistant on an old laptop. The lot came in around £350 and it's been running solid for over a year. Here's how to copy it.
What a smart home actually is, and why bother in a flat
Forget voice assistants and robot hoovers for a minute. A smart home is really just a network of devices that talk to each other and run scenarios without you lifting a finger. Walk into the hall of an evening and the lights fade up by themselves. Go to bed, and everything bar the fridge drops to standby while a faint night light glows in the hall. That's mine, day in, day out. No magic — motion sensors and a few timers doing the donkey work every time you come home or turn in.
The first reason to bother is convenience, and you feel it daily. Sick of being a human light switch? One button by the bed, labelled "Night", kills the main lights, dims the bedside lamp, and arms the alarm. That's it, sorted. Scenes ended up being the backbone of how the flat feels: bright and cold for focused work, warm and low for the evening, almost dark for a film.
Second reason: money. I fitted Sonoff TRVZB heads to the radiators and they manage each room on its own, easing off when nobody's in — and that's where the savings live. The bills came down noticeably over a heating season. Keeping an eye on usage with the energy cost calculator is how you sniff out the "vampires" too. A mate found an ageing immersion quietly burning a fortune a month that way — it never showed up until he looked at the numbers per circuit.
Third: security. A leak sensor under the sink can shut off the water and bombard your phone before you've the faintest idea anything's wrong. Motion and door sensors flag odd activity when the flat's empty. While I'm away the system fakes presence, cycling lamps around the flat on a loose schedule — it's no substitute for a real alarm, but it's a solid extra layer over your own space.
Zigbee, Wi-Fi, Z-Wave, Matter — which to pick
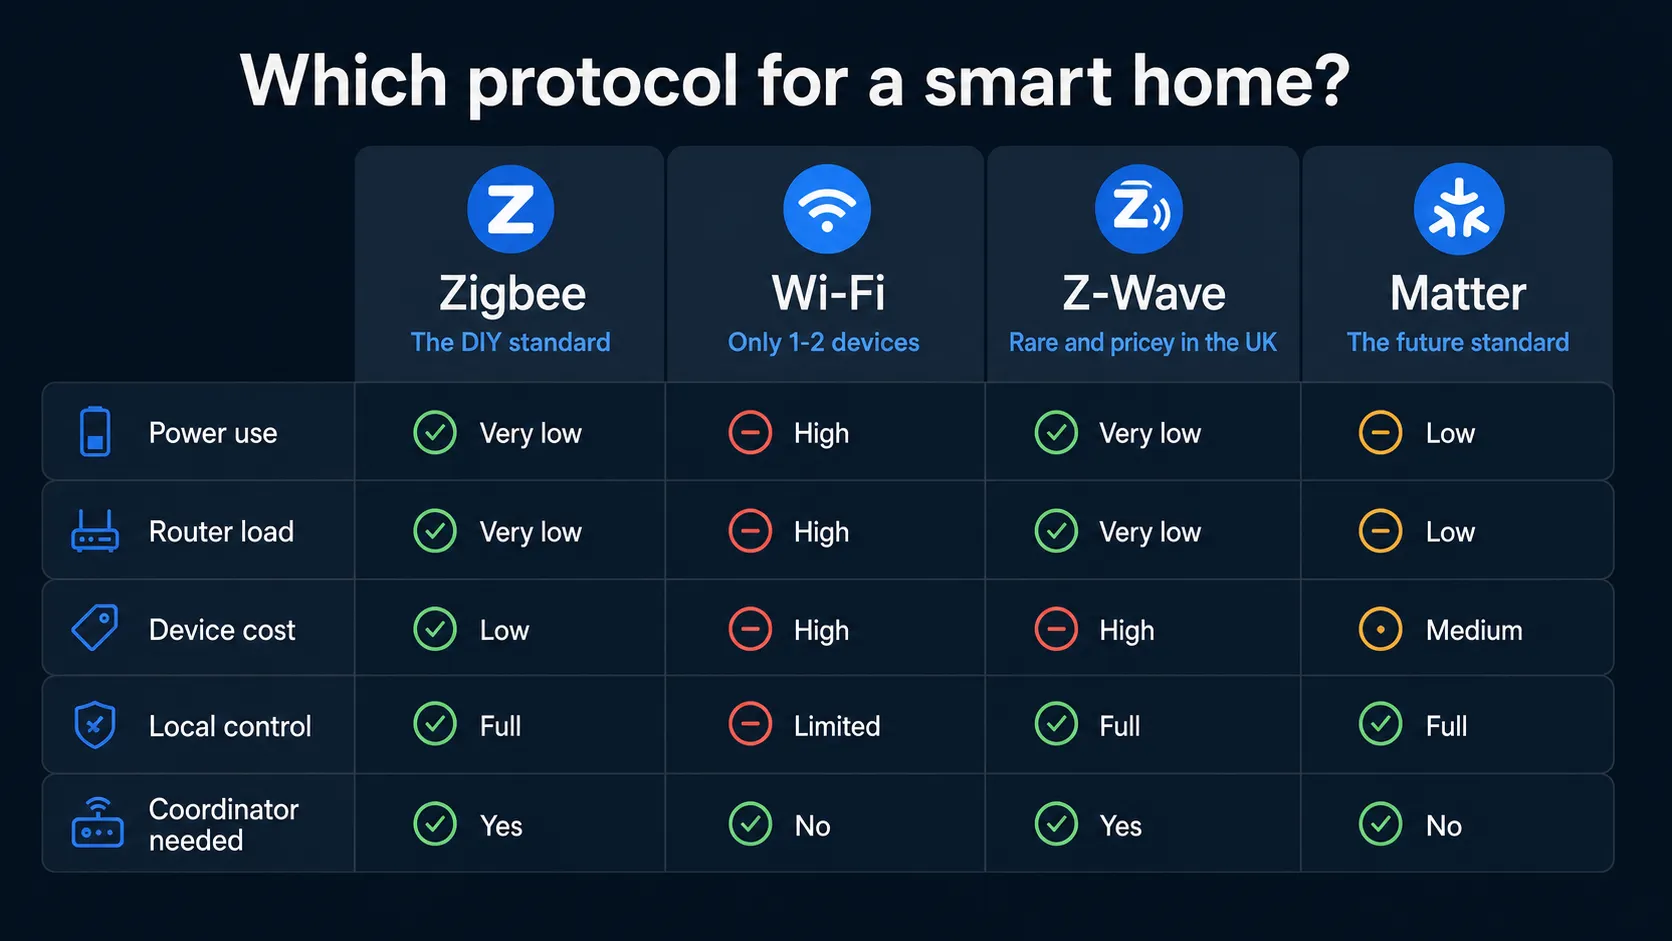
Choosing a protocol is a bit like buying a phone: they all do roughly the same job, but under the bonnet they're completely different worlds with their own snags and strengths. One drains a battery in an afternoon. Another only works while a cloud server somewhere stays up. A third costs the earth.
The core difference is philosophy. Wi-Fi was built for streaming telly and fast browsing — not for a tiny window sensor to sit on a single coin cell for two or three years without a peep. Z-Wave is reliable but locked inside a pricey, niche ecosystem. Matter promises to tie everything together, yet it's still young, and in 2026 the catalogue of devices you can actually buy is thin.
Here's the lay of the land:
| Spec | Zigbee | Wi-Fi | Z-Wave | Matter/Thread |
|---|---|---|---|---|
| Power use | Very low | High | Low | Low |
| Load on your router | None (own mesh) | Heavy | None | Partial |
| Device cost | Low | Lowest | High | Medium |
| Local control | Full (HA) | Often cloud | Full | Potentially |
| Coordinator needed | Yes (USB/LAN) | No | Yes | Yes |
The table gives you the theory; real life adds the footnotes the spec sheet leaves out. My own go at Wi-Fi sockets — cheap Tuya-badged ones — went badly. Within six months three of the five had vanished off the network, and the constant reconnecting and reliance on someone else's servers pushed me to find something steadier.
Why Zigbee is the sweet spot for a flat
Zigbee was the calm after the Wi-Fi storms. Its biggest trick is the self-healing mesh: every mains-powered gadget — a plug, an in-wall module — also acts as a repeater for its neighbours. The switch boosts the sensor. The plug helps the bulb. The more kit you add, the stronger and more stubborn the whole network gets.
It barely clashes with Wi-Fi, either. Both live in the 2.4 GHz band, but Zigbee tucks itself into narrow channels of its own, so it won't muddy your streaming or video calls even with thirty-odd nodes chattering away. The power use genuinely surprises people: wireless motion, temperature, and door sensors run a year or two on a single CR2032 coin cell.
And the ecosystem stays open. Sonoff, Aqara, IKEA — all of it sits happily in one dashboard thanks to Home Assistant and the Zigbee2MQTT bridge (ZHA is the simpler built-in alternative if you'd rather not run MQTT). No being chained to one brand. A budget sensor is around a tenner; a radiator head, £35-45. For a flat, that's the right blend of price, stability, and "fit and forget".
Cloud or local control
When you pick the foundation for your automation, you're really deciding who gets to control your day-to-day living — somebody else's servers, or your own box in the cupboard. Two worlds. Cloud platforms sell you simplicity; local ones sell you independence. That choice decides whether your home keeps working always, or only while a provider keeps the lights on.
Tuya and the cloud crowd — easy, but with strings
Set-up takes minutes. A tidy app, voice assistants, the lot — the appeal of the big cloud platforms is real, and it tempts even seasoned tinkerers. But the logic doesn't live in your home; it lives on a far-off server, which means you're at the mercy of a steady internet connection.
This isn't a theoretical worry. A mate of mine lost his broadband for half a day and discovered his Tuya bulbs had reverted to being plain old bulbs — there he was in a dark hall, jabbing at an app that just said "connecting". And the risk isn't only the connection. Companies move APIs behind paywalls, quietly drop support for older models, and ship data about your home off to servers you've no sight of. Pile on the router load too — push past fifteen or twenty Wi-Fi gadgets and the network starts to wheeze.
Home Assistant — free, local, no subscription
This is the route for anyone who values being in charge. Home Assistant runs on your own hardware — a Raspberry Pi, an old laptop, a mini PC — and every automation runs inside your own four walls, no outside servers involved. Internet drops out? It carries on managing heating, lights, and notifications regardless.
The community behind it is remarkably busy — monthly updates, and support for thousands of integrations that pull Zigbee, Z-Wave, Wi-Fi, Bluetooth, and Matter into one dashboard no matter the maker. There's no cost barrier. Home Assistant Cloud (Nabu Casa) costs around a fiver a month for easy remote access, but it's optional — I use a VPN instead, which is free and arguably safer.
A starter kit, with UK prices
Building the kit is like clicking together a construction set, each block doing one job. Here's what I started with, and where to get it.
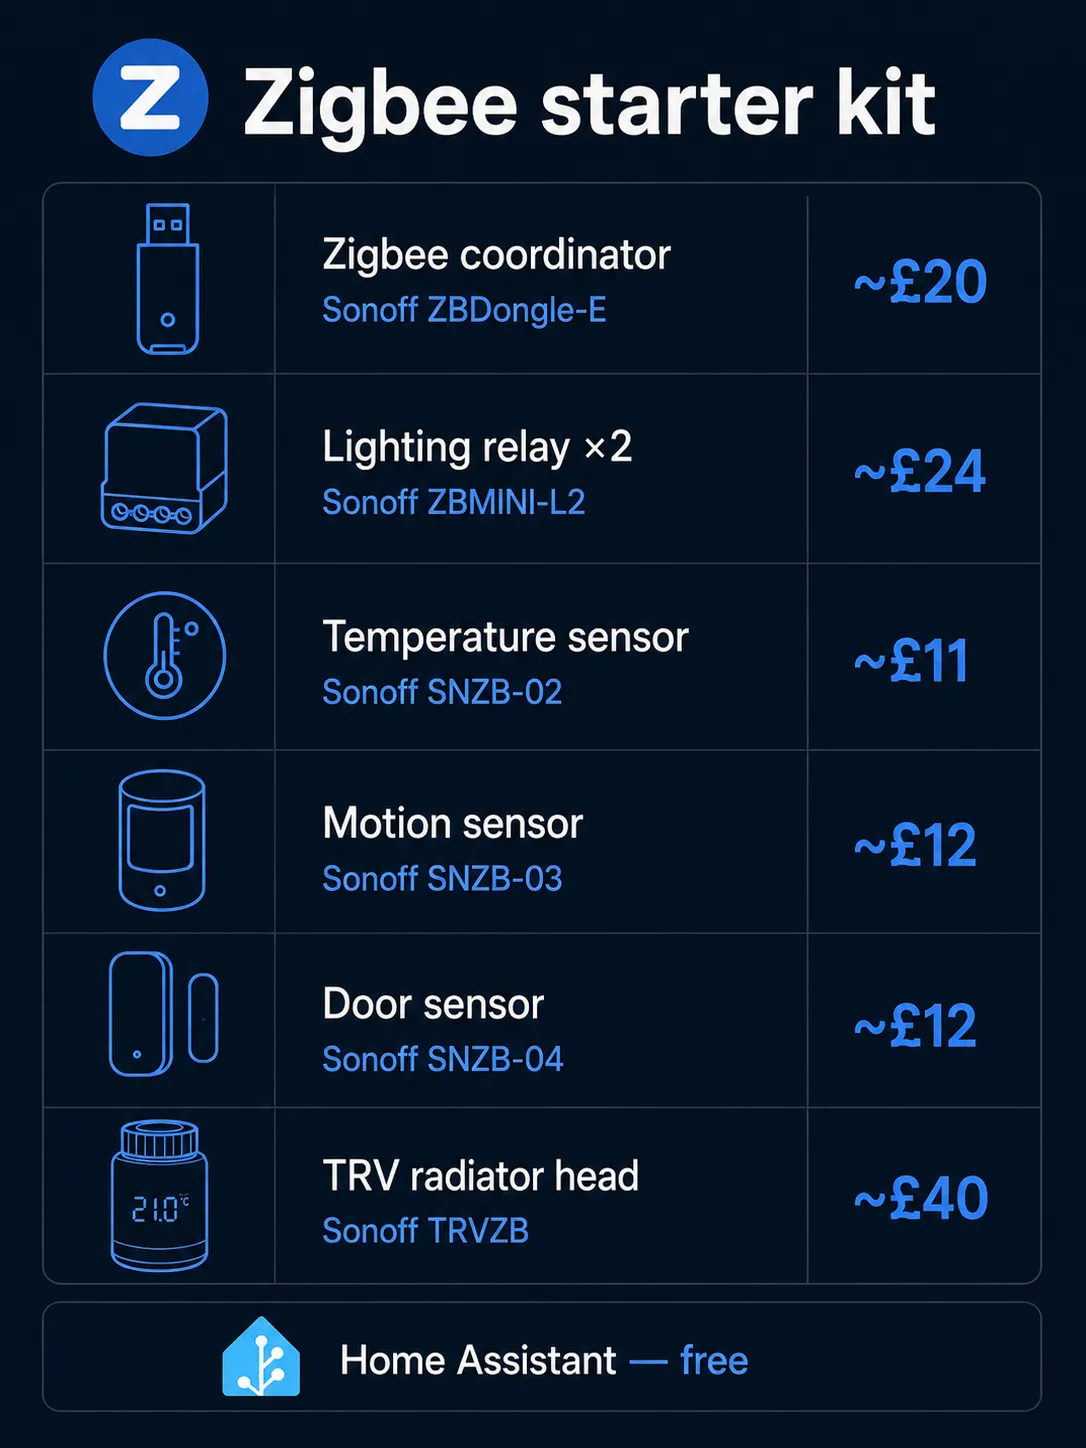
The Zigbee coordinator
The brain of the network — without it, no wireless gadget can talk to your server.
- Sonoff ZBDongle-E (USB, EFR32MG21 chip) — around £15-25 on Amazon.co.uk, and it's become the default for good reason: plugs into USB, handles a couple of hundred nodes over the mesh, works straight off with Home Assistant. For most people it's all you'll ever need.
- SMLIGHT SLZB-06 (LAN/PoE/USB/Wi-Fi) — roughly £30-40 from Vesternet or Amazon, with an Ethernet option that's far steadier than USB because it doesn't care about computer reboots or dodgy ports.
- Home Assistant SkyConnect / Connect ZBT-1 — the official dongle, about £25-30 from The Pi Hut, handy if you want Zigbee and Thread/Matter from one stick.
For a first step the ZBDongle-E will do nicely — thousands of UK users have proven it in the wild.
Relays and switches: with neutral and without
Tricky bit. This is where most people come unstuck, and I was no exception — more on that below. A relay turns an ordinary wall switch into a remote-controlled module. Two types, and the gap between them matters.
- Sonoff ZBMINI — about £10-13, needs a neutral (N) and tucks into the back box behind a standard switch.
- Sonoff ZBMINI-L2 — around £12 (Pimoroni, The Pi Hut), and this one works WITHOUT a neutral, which makes it the answer for older flats and conversions where the switch back box never had one.
Let me explain the difference. In a lot of older UK homes the lighting was wired the lean way: only a switched live runs to the switch, with the neutral joined up at the ceiling rose, so there's no neutral sitting in the back box at all. A normal relay is dead in the water there. The ZBMINI-L2 gets round it by drawing a trickle through the lamp itself — which is exactly what a fair chunk of British housing stock needs.
Not sure what's behind your switch? Turn off the circuit at the consumer unit, unscrew the faceplate, and count the cables in the back box. No spare neutral terminal? Go for the ZBMINI-L2. Got a neutral? The standard ZBMINI is fine. (And mind the depth — a deep 35 mm back box makes squeezing the module in far less of a wrestle than a shallow 16 mm one.)
In my own place I fitted ZBMINI-L2s throughout, since there was no neutral at the switches and rewiring wasn't on the cards — and the little thing's been faultless for over a year.
Sensors: temperature, motion, door
These give the system its senses — without them, automation is blind and motionless.
- Sonoff SNZB-02 (temperature/humidity) — a small disc, about £10-12 (cheaper in a two-pack). Sticks to the wall, runs around eighteen months on a CR2450, and its readings drive your heating and any plug-in heaters.
- Sonoff SNZB-03 (motion) — a PIR unit at roughly £10-13 that catches movement and fires an instant signal to switch on a hallway or bathroom light.
- Sonoff SNZB-04 (door/window) — a two-part magnetic contact, around £10-13: one half on the door, the other on the frame, and the moment they part the system knows it's open.
Worth a mention: Aqara. The equivalents cost a touch more but come with a nicer case and, generally, better battery life.
TRV radiator heads
Optional, but a cracking upgrade. This is the efficiency play, and it tends to pay for itself inside a single heating season by trimming the heat you'd otherwise throw away.
- Sonoff TRVZB — around £35-45 depending on retailer, with a standard M30×1.5 thread that fits the vast majority of UK radiator valves. (Bigger names like Tado and Hive sell smart TRVs too, but they lean on their own hubs and subscriptions — the Sonoff drops straight into a local Zigbee setup.)
The real magic kicks in paired with an SNZB-02 sensor: you set the temperature you want in Home Assistant, the platform compares it with the real reading in the room, and the TRVZB nudges the flow to match — no fiddling, and a meaningful trim off the heating bill with no loss of comfort.
Tying it into the consumer unit: Shelly on the DIN rail
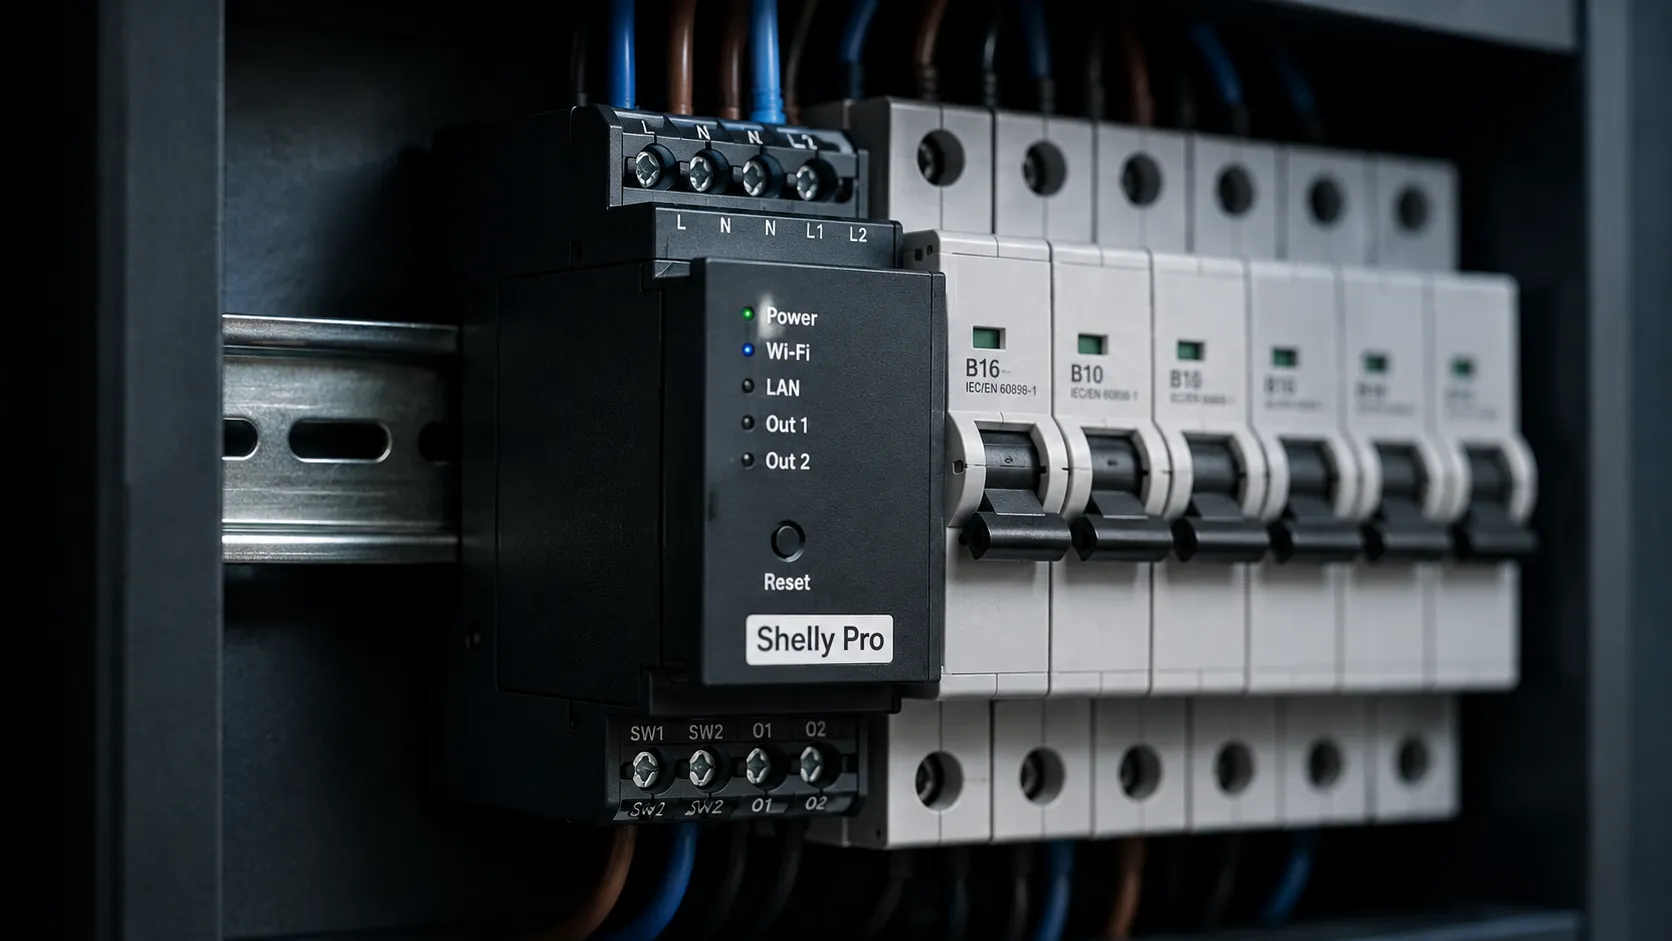
Most people picture automation as a scatter of little boxes behind curtains or above ceilings, but there's a far tidier way — fit the control modules straight into the consumer unit on the standard DIN rail, alongside the breakers. Nothing cluttering the rooms; all the logic hidden behind the board's door.
A Shelly Pro 1 (1×16 A, Wi-Fi/LAN/Bluetooth) runs about £50-60 and switches one load — if your board sits in a cupboard with rotten signal, that LAN port is a lifesaver. For more, the Shelly Pro 1PM adds power metering at roughly £70-75 (£72.49 at the UK Shelly Store), so you can see exactly what the immersion or a heater is drawing minute by minute.
In practice the possibilities are excellent. The immersion on its own module heats only during cheap hours; a hallway lighting circuit through a Shelly plus a motion sensor comes on by itself with no "smart" wall switch at all. I did this at mine and it turned out neater than relays stuffed into back boxes.
Shelly Pro modules need a neutral (N), and the bigger caveat is the regs: hard-wiring a device into the consumer unit is, in practice, a job for a registered electrician. Plug-in modules and behind-switch relays are fair DIY; cutting into the board is not. And any work in there is done with the main switch off and proved dead first — the board is no place to chance it.
A quick word on the rules, because it's the part most guides skip. In England and Wales, work inside the consumer unit and any new circuit is notifiable under Part P of the Building Regulations — that means a registered electrician (NICEIC, NAPIT) who self-certifies, or notifying Building Control before you start. Adding a plug-in smart plug or a behind-switch module to an existing circuit outside a bathroom isn't notifiable, so plenty of the kit in this guide is DIY-fine — work in a room with a bath or shower is a special location and does count, and the DIN-rail Shelly going into the board firmly crosses the line into sparky territory. Scotland runs its own Building Standards; Northern Ireland has no Part P equivalent — but BS 7671 is the common technical standard UK-wide.
When you do plan the board, the breaker selection guide covers sizing each circuit, and a tidy, well-labelled board saves your sanity during any future fault-finding.
The budget: a smart home for £300-500
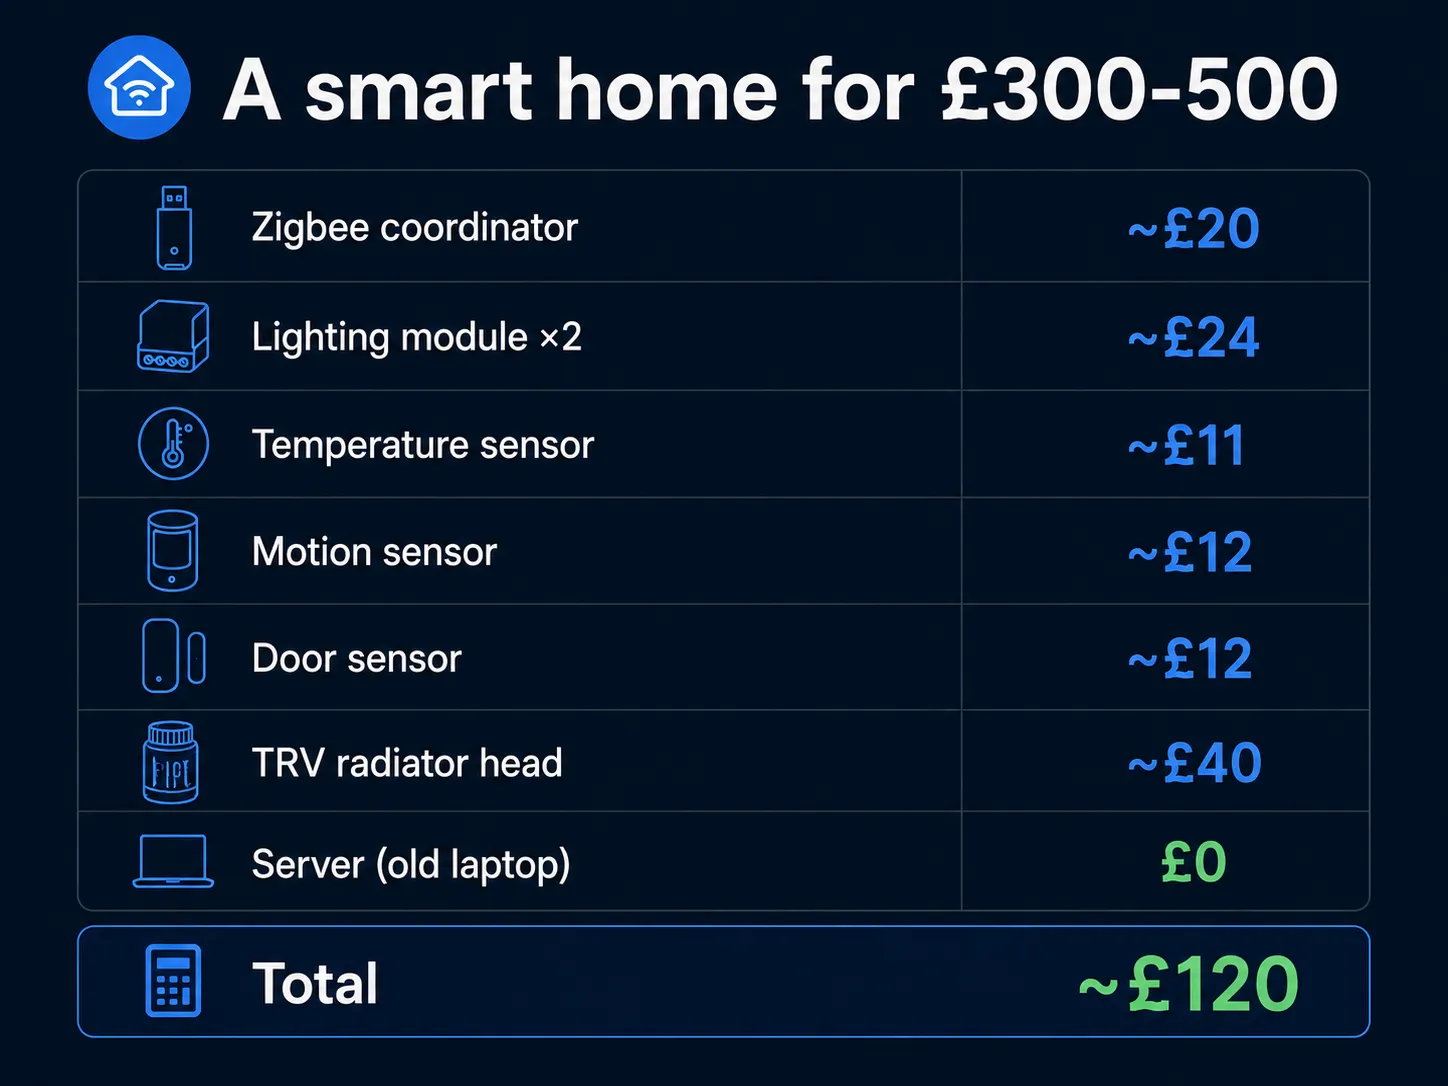
Automating the flat doesn't demand a serious outlay, and my real starter bill proves it:
| Item | Model | Cost |
|---|---|---|
| Zigbee coordinator | Sonoff ZBDongle-E | ~£20 |
| Lighting module ×2 | Sonoff ZBMINI-L2 | ~£24 |
| Temperature sensor | Sonoff SNZB-02 | ~£11 |
| Motion sensor | Sonoff SNZB-03 | ~£12 |
| Door sensor | Sonoff SNZB-04 | ~£12 |
| TRV radiator head | Sonoff TRVZB | ~£40 |
| Server (old laptop) | Already had one | £0 |
| Total | ~£120 |
That bare-bones kit is barely over a hundred quid. A realistic "proper first system" — a few more sensors, a couple of smart plugs, a second TRV or two, and a leak detector under the sink — lands you comfortably in the £300-500 range, which is still a fraction of the grand-plus my mates swore was the minimum. The server is the swing factor: keep using an old laptop and it's free; buy a Home Assistant Green (£159 at The Pi Hut) or a Raspberry Pi setup and that's your biggest single line.
An old laptop makes an ideal Home Assistant server — it's got a built-in battery that doubles as a little UPS through short power cuts, and it's quieter than a desktop tower humming away.
Before you start, I'd run a power audit — you'll spot the hungriest appliances straight off and work out which circuits are worth automating first.
Where to run Home Assistant
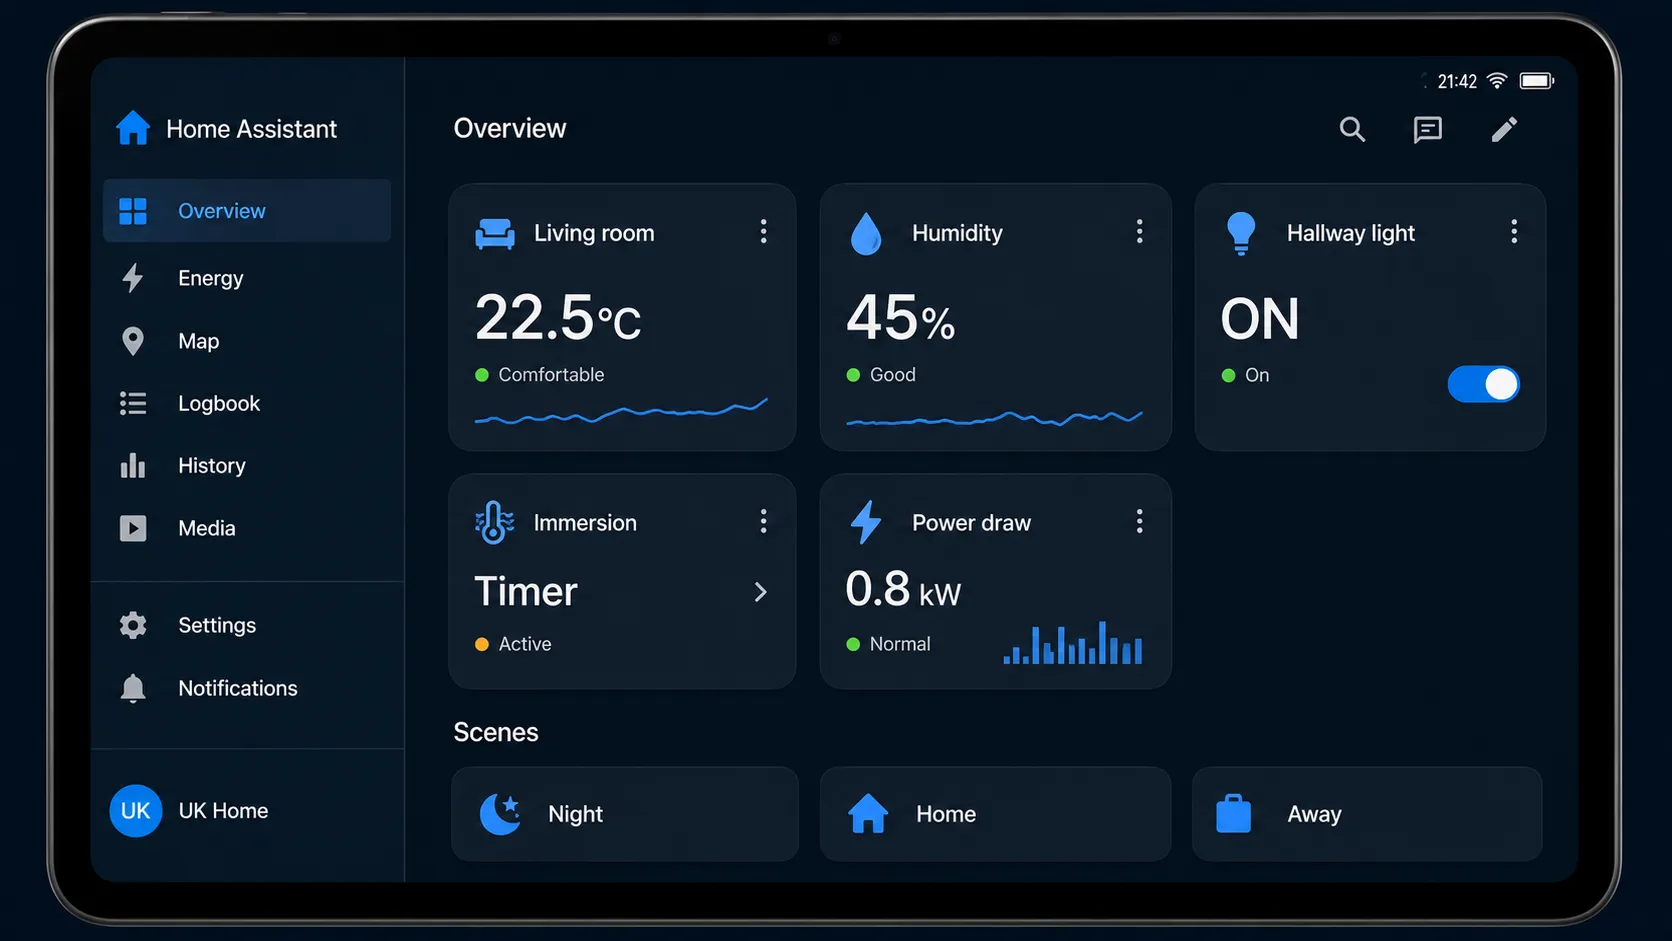
An old laptop or PC
The free way to start. Any laptop or desktop gathering dust on a shelf can turn into a full home-automation server — and a laptop has one killer advantage: a built-in battery, so the platform keeps ticking over for an hour or two even when the mains drops.
Downsides? A few. My old ThinkPad whirrs its fan and pulls about 50 W — over a month that's a few extra kWh and a quid or two on the bill. Liveable, not ideal. I run Home Assistant in Docker on it: a tidy isolated container, backups in a couple of clicks, painless updates.
Raspberry Pi or Home Assistant Green
Want silence and something pocket-sized? Single-board it. A Raspberry Pi 5 (4-8 GB) sits around £60-80 for the board, draws a handful of watts, and barely warms up. Add a good case, power supply, and storage and you're nearer £120-150 all in.
Prefer plug-and-play? The Home Assistant Green is £159 at The Pi Hut — everything in one box, no flashing SD cards, plug it in and it sets itself up. Whichever Pi route you take, skip the cheap microSD and run from a decent A2 card or, better, a USB SSD — heavy read/write will kill a budget card in a year or two. Regular backups are non-negotiable.
A mini PC (NUC, Beelink)
The top tier. The pick for big installs with dozens of integrations and camera feeds. Secondhand from around £80; new models £150-250. The x86 architecture lets you fit a proper SSD instead of a fragile memory card, and modern boards sip 10-15 W even under load — the most dependable option if you're planning to scale up seriously.
Automation scenarios that actually earn their keep
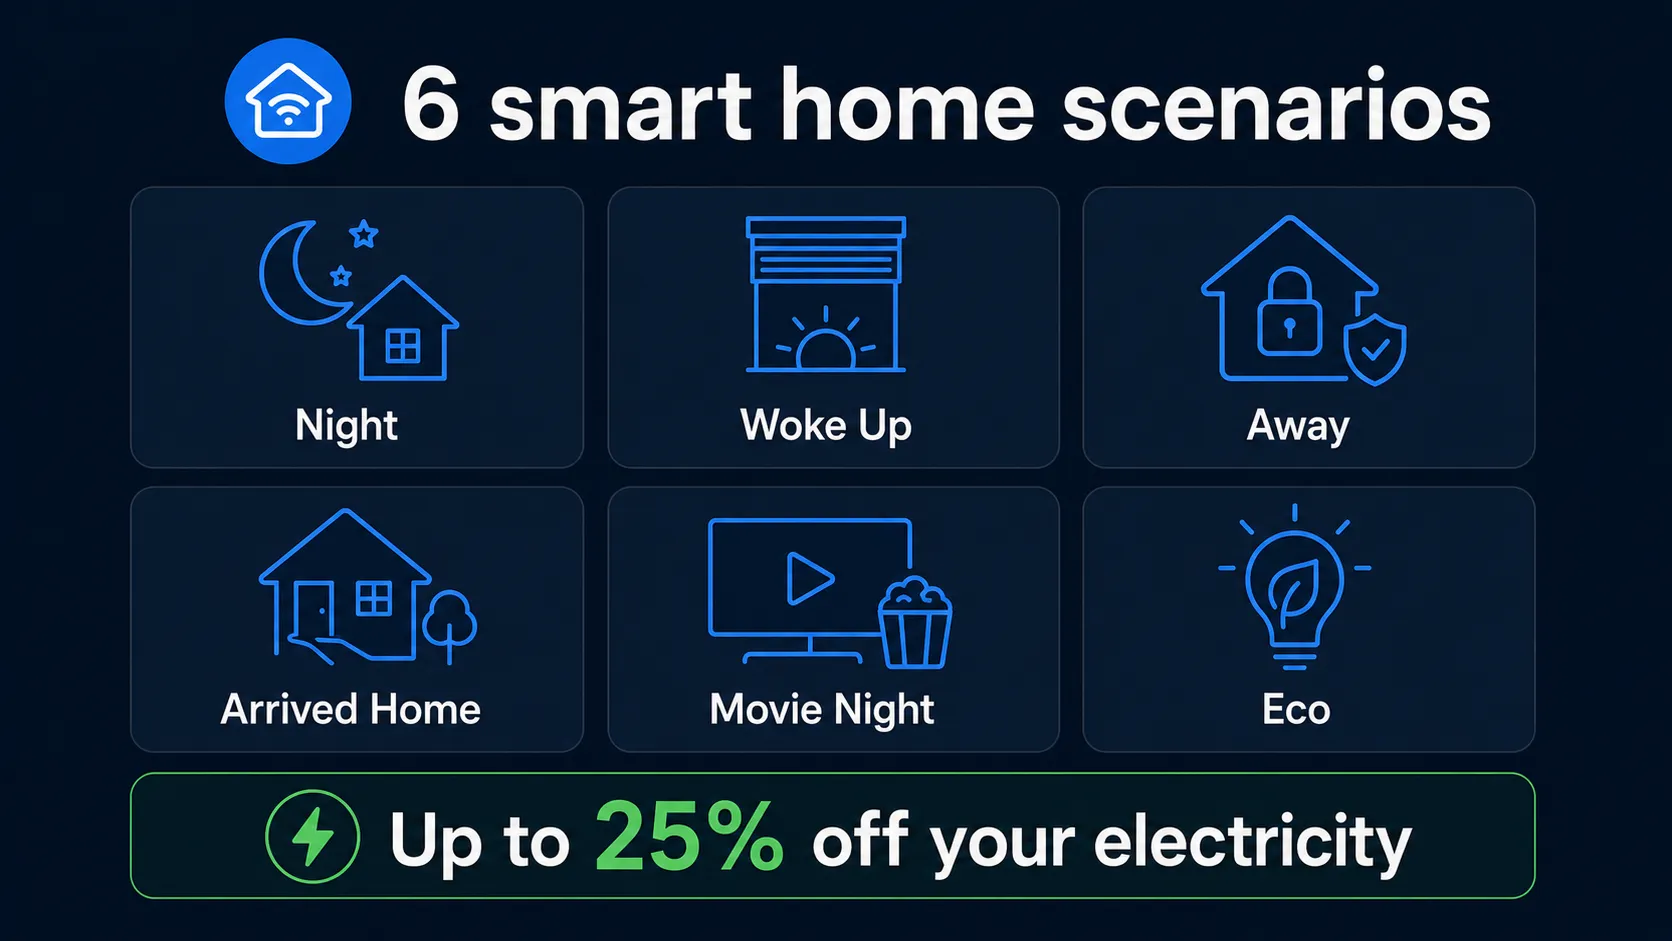
Lighting: arriving home, films, night
Automatic lighting is the foundation, and it changes your daily habits from day one. The "Arrived Home" scene fires when the door sensor catches the front door opening — hall and kitchen come up to about seventy per cent, so there's no fumbling along the wall in the dark.
"Movie Night" — one button, the living room dims to twenty per cent, the hall goes dark, nothing to pull your eye off the screen. At eleven, "Night" runs itself: main lights off, but a hallway night light glows at a faint five per cent so you can reach the kitchen without fully waking up.
Climate: thermostat plus TRV
To stop overpaying on heating, pair a Sonoff TRVZB on the radiator with a wireless SNZB-02 sensor. Hold 21°C through the day, drop to 17-18°C overnight or when nobody's in — all of it hands-off.
The neatest trick is the window link. The SNZB-04 contact spots a window opening and the radiator head shuts the flow at once, so you're not heating the street. I saved a fair bit over the last heating season off that one simple combo of three cheap gadgets. If you're on a time-of-use tariff — Octopus Agile or similar — you can take it further and lean heating and the immersion into the cheap half-hours, which is where smart heating genuinely earns its keep in the UK.
Security: sensors plus alerts
Tiny outlay, real result — even if you just worry about the flat during the working day or a week away. Motion sensor by the door plus an armed "Nobody Home" mode, and any trip sends a push to your phone through the Home Assistant app. You react straight away.
Another trick — while away I run presence simulation, lamps flicking on and off across rooms of an evening on a random schedule, so it looks like someone's in. Simple deterrent — neighbours have confirmed it genuinely reads as a lived-in flat from the street.
Energy monitoring
Knowing what you're burning is step one. A Shelly PM module fitted in the consumer unit feeds Home Assistant and draws live graphs per circuit, so you can see who the real "vampire" is among your appliances.
Prime suspect? The immersion — shift its heating to the cheap overnight or pre-Agile-spike hours and you can knock a useful sum off the monthly bill with no discomfort at all. The energy cost calculator will work out the actual saving for your own kit.
Working through a power cut: UPS plus Zigbee
Power cuts still crop up — a tripped main, a DNO fault, the odd storm — and a smart home shouldn't fall over the moment the lights do. Local tech and a bit of battery backup keep it alive even without mains or broadband.
Power first. The heart of the local setup is the router, and a small UPS at £30-50 gives it two to four hours and rides out most short outages. Home Assistant on a laptop is the dream here — the built-in battery is the backup, no extra box needed.
Then connectivity. This is where Zigbee shows its hand — it builds its own mesh between nodes and needs no internet whatsoever to keep working. An SMLIGHT SLZB-06 coordinator on Ethernet holds the network up independently, not even tied to the server's USB port.
What stays alive: every Zigbee sensor (motion, door, temperature), the Home Assistant automations built on them, and local notifications over mobile data. What stops: Wi-Fi modules (a Shelly with no router is dead), cloud services (Tuya, Google Home), and voice assistants — first to go in any outage.
Common beginner mistakes
When I started out I made plenty of these, and I see the same slips in mates just getting going.
Buying everything at once. Excitement fills the basket with sensors, bulbs, and modules — but systems aren't built in a day. Start with two or three gadgets, set them up, learn how they hang together, then grow it. Otherwise it's a heap of boxes on a shelf and disappointment instead of comfort.
Choosing Wi-Fi over Zigbee. Seems simpler at first: buy a bulb, connect it, done. Illusion. Pile up twenty or thirty and the average home router can't cope, the network sags, and lag becomes the norm. Zigbee scales to hundreds of nodes and leaves your Wi-Fi alone.
Tying yourself to the cloud. Tuya, Google Home, Alexa — handy while the servers are up. But they go paywalled, vanish from the market, or fall over at the worst possible moment, and your smart home is suddenly just a flat again. Local control through Home Assistant is the only guarantee the keys stay in your hand.
Ignoring the neutral. Classic, and it caught me out personally. Bought a ZBMINI, opened the back box — just a switched live, no neutral anywhere near. The module went in a drawer and I went chasing a ZBMINI-L2 that works without one. Always check the wiring before you buy.
Not planning the electrics for automation. A rewire or refurb is the golden chance to set yourself up for years. The biggest miss is not running a neutral to every switch while the walls are open. Even if you don't need a smart module today, you might in a year — and after the decorating's done, that's dust, mess, and unwelcome expense. Build in the slack. For getting the board itself right, see assembling a consumer unit for a one-bed flat.
FAQ
In short
A smart home in a flat isn't the preserve of gadget obsessives with bottomless budgets — it's a doable project from a couple of hundred quid that gives you working automatic lighting, climate control, and basic security. The recipe's simple: Zigbee over Wi-Fi, Home Assistant over the cloud, and steady expansion over impulse buys.
If you're at the planning or refurb stage, design the board with future smart kit in mind — and remember the one line that matters: anything wired into the board itself is a registered-electrician job, while plug-in and behind-switch modules are yours to fit. For the breaker side of that board, the MCB selection guide covers it, and you can lay the whole thing out online in the ElectroBoard configurator, leaving room for a coordinator, DIN-rail Shelly modules, and a neutral run to every switch.
You've just read a full guide to starting a smart home on a budget — it'll be just as handy for a mate who's mid-refurb or daydreaming about an automated flat. Share the link and help their project come together cheaper and smarter.